

노션의 화려한 기능의 에디터를 그나마 비슷하게 따라 하기 위해 여러 가지 도전을 해보려 합니다.
다음과 같은 순서로 진행합니다.
- enter로 다른 DOM으로 분리하기 & shift+enter로 줄 바꿈 하기
- Drag&Drop으로 위치 변경하기
enter로 다른 DOM으로 분리하기 & shift +enter로 줄 바꿈 하기
먼저, contentEditable div를 만들어 해당 div안에서 enter를 입력하게 되면 새로운 contentEditable div를 만들 도록하겠습니다.
export default class EditorTotalContents extends Component {
...
	template() {
        return `
          <input name="title" type="text" placeholder = "제목 없음" class = "editor__input--title" value = "${
            this.state.totalContents.title
          }"/>
          <div class = "editor__content">
            <div class = "editor__content--container">
              <span class="material-symbols-rounded"> drag_indicator </span>
              <div name="content" contentEditable="true" data-placeholder = "글을 자유롭게 작성하세요. 명령어를 사용하려면 '/' 키를 누르세요." class = "editor__input--content">${
                this.state.totalContents.content || ""
              }</div>
            </div>
          </div>
          `;
    }
    setEvent() {
        this.addEvent("keydown", ".editor__content", (e) => {
          if (e.key === "Enter") {
            if (e.shiftKey) {
              return;
            } else {
              e.preventDefault();
              const newDiv = document.createElement("div");
              newDiv.classList.add("editor__content--container");
              newDiv.innerHTML = `<span class="material-symbols-rounded editor__content--drag"> drag_indicator </span>
              <div name="content" contentEditable="true" data-placeholder = "글을 자유롭게 작성하세요. 명령어를 사용하려면 '/' 키를 누르세요." class = "editor__input--content"></div>`; // 초기 내용 비우기

              const selection = this.$target.querySelector(".editor__content");
              selection.appendChild(newDiv);

              const newContent = newDiv.querySelector(".editor__input--content");
              newContent.focus();
            }
          }
        });
      }
  }
    ...
}
이 코드를 통해 enter를 입력하면 다음과 같은 결과가 만들어집니다.
여기서 수정해야 할 부분은 focus 된 노드에만 placeholder가 나타나도록 만드는 것입니다.
다음과 같은 이벤트를 추가해 목적을 달성할 수 있습니다.
this.addEvent("focusin", ".editor__input--content", (e) => {
  if (this.currentPlaceholderElement === e.target) return;
  if (this.currentPlaceholderElement) {
    this.currentPlaceholderElement.removeAttribute("data-placeholder");
  }
  e.target.setAttribute(
    "data-placeholder",
    "글을 자유롭게 작성하세요. 명령어를 사용하려면 '/' 키를 누르세요."
  );
  this.currentPlaceholderElement = e.target;
});
현재 placeholderElement가 존재하는 노드를 기억해놨다 focus 한 노드에 placeholderElement를 추가하고 기존에 있던 것은 삭제하는 방식으로 적용했습니다.
주목할 점은, 여기서 focus 대신 focusin을 사용했는데 둘은 같은 역할을 하지만 focus의 경우 이벤트 버블링이 일어나지 않기 때문에 이벤트 버블링을 이용한다면 focusin을 사용해야 합니다. 그리고 저는 이벤트를 버블링을 이용해 위임하기 때문에 focusin을 사용했습니다.
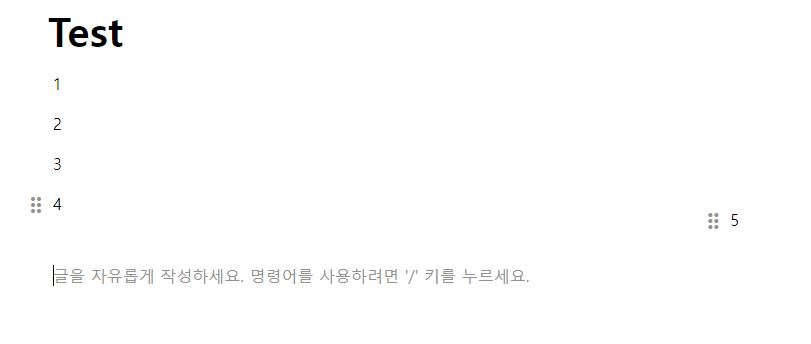
문제 발생
엔터 입력시 추가되는 노드가 맨 뒤에만 추가되는 문제
이전에 만들어진 노드에서 엔터를 입력하면 현재 다음과 같이 노드를 추가해 주기 때문에
selection.appendChild(newDiv);어떤 위치에서 엔터를 입력하던 맨 마지막 노드 뒤에 생성이 되고 있습니다.
이를 수정하기 위해 다음과 같은 코드를 추가했습니다.
export default class EditorTotalContents extends Component {
...
	template() {
        return `
          <input name="title" type="text" placeholder = "제목 없음" class = "editor__input--title" value = "${
            this.state.totalContents.title
          }"/>
          <div class = "editor__content">
            <div class = "editor__content--container">
              <span class="material-symbols-rounded"> drag_indicator </span>
              <div name="content" contentEditable="true" data-placeholder = "글을 자유롭게 작성하세요. 명령어를 사용하려면 '/' 키를 누르세요." class = "editor__input--content">${
                this.state.totalContents.content || ""
              }</div>
            </div>
          </div>
          `;
    }
    setEvent() {
        this.addEvent("keydown", ".editor__content", (e) => {
          if (e.key === "Enter") {
            if (e.shiftKey) {
              return;
            } else {
              e.preventDefault();
              const newDiv = document.createElement("div");
              newDiv.classList.add("editor__content--container");
              newDiv.innerHTML = `<span class="material-symbols-rounded editor__content--drag"> drag_indicator </span>
              <div name="content" contentEditable="true" data-placeholder = "글을 자유롭게 작성하세요. 명령어를 사용하려면 '/' 키를 누르세요." class = "editor__input--content"></div>`; // 초기 내용 비우기

              const selection = this.$target.querySelector(".editor__content");
              //selection.appendChild(newDiv);
              //추가됨
              const index = [...selection.childNodes].indexOf(e.target.parentNode);
              selection.insertBefore(newDiv, selection.children[index + 1] || null);

              const newContent = newDiv.querySelector(".editor__input--content");
              newContent.focus();
            }
          }
        });
      }
  }
    ...
}
const index = [...selection.childNodes].indexOf(e.target.parentNode);
selection.insertBefore(newDiv, selection.children[index + 1] || null);
해당 코드를 통해 기존 노드에 엔터를 입력하는 노드의 위치 바로 다음에 새로운 Div를 추가하는 방식입니다.
이때 주의할 점은 childNodes의 요소를 살펴보면 의도하지 않은 요소가 들어가 있다면 순서가 엉망이 될 수 있으니 해당 노드에 변수가 발생하지 않도록 해주는 것이 좋습니다.
저는 template()에 계속 text요소(줄 바꿈으로 추정)가 추가되어 있어 다음과 같이 리터럴 템플릿을 다 더해서 한 줄로 만들어주는 조치를 취했습니다.
//prettier-ignore
  template() {
    return `<input name="title" type="text" placeholder = "제목 없음" class = "editor__input--title" value = "${this.state.totalContents.title}"/>`+
      `<div class = "editor__content">`+
        `<div class = "editor__content--container">`+
          `<span class="material-symbols-rounded editor__content--drag"> drag_indicator </span>`+
          `<div name="content" contentEditable="true" data-placeholder = "글을 자유롭게 작성하세요. 명령어를 사용하려면 '/' 키를 누르세요." class = "editor__input--content">${this.state.totalContents.content || ""}</div>`+
        `</div>`+
      `</div>`;
  }
Drag&Drop으로 위치 변경하기
다음으로 노드를 드래그해 원하는 위치에 드롭해 순서를 변경할 수 있는 기능을 추가해 보겠습니다.
드래그가 가능한 노드들은 draggable="true" 속성을 추가해 줍니다.
<div class="editor__content--container" draggable="true">
	<span class="material-symbols-rounded editor__content--drag"> drag_indicator </span>
  	<div name="content" contenteditable="true" class="editor__input--content">1</div>
</div>
이후 drag를 시작할 때(dragstart), drag가 끝날 때(dragend) , drag가 진행되어 마우스가 대상 객체의 위에 자리 잡고 있을 때 (dragover) 세 종류의 이벤트를 추가해 줍니다.
this.addEvent("dragstart", ".editor__content--container", (e) => {
  e.dataTransfer.setData("text/plain", e.target.outerHTML);
  e.target.classList.add("dragging");
});

this.addEvent("dragend", ".editor__content--container", (e) => {
  e.target.classList.remove("dragging");
});

this.addEvent("dragover", ".editor__content--container", (e) => {
  e.preventDefault();
  const afterElement = getDragAfterElement(e.target.parentNode, e.clientY);
  const dragging = document.querySelector(".dragging");
  if (afterElement === null) {
    e.target.parentNode.appendChild(dragging);
  } else {
    e.target.parentNode.insertBefore(dragging, afterElement);
  }
});
각 코드를 간단하게 설명하면
1. dragstart
this.addEvent("dragstart", ".editor__content--container", (e) => {
  e.target.classList.add("dragging");
});
드래그가 시작될 때 해당 노드의 클래스에 dragging을 추가해 줍니다. (css로 스타일링이 가능해짐 + 식별 가능)
2. dragend
this.addEvent("dragend", ".editor__content--container", (e) => {
  e.target.classList.remove("dragging");
});
드래그가 종료될 때 해당 노드에 추가되어 있던 dragging을 제거해 줍니다.
3. dragover
this.addEvent("dragover", ".editor__content--container", (e) => {
  e.preventDefault();
  const afterElement = getDragAfterElement(e.target.parentNode, e.clientY);
  const dragging = document.querySelector(".dragging");
  if (afterElement === null) {
    e.target.parentNode.appendChild(dragging);
  } else {
    e.target.parentNode.insertBefore(dragging, afterElement);
  }
});
가장 설명이 복잡한 이벤트로 이 부분은 좀 자세히 설명하겠습니다.
이 이벤트는 드래그 도중 마우스가 존재하는 가장 가까운 위치의 노드를 판별해 적절한 위치에 드래그된 노드를 추가해 줍니다. 여기서 getDragAfterElement가 중요한데, 코드는 다음과 같습니다.
const getDragAfterElement = (container, y) => {
  const draggableElements = [
    ...container.querySelectorAll(".editor__content--container:not(.dragging)"),
  ];
  return draggableElements.reduce(
    (closest, child) => {
      const box = child.getBoundingClientRect();
      const offset = y - box.top - box.height / 2;
      if (offset < 0 && offset > closest.offset) {
        return { offset: offset, element: child };
      } else {
        return closest;
      }
    },
    { offset: Number.NEGATIVE_INFINITY }
  ).element;
};
코드의 흐름대로 설명하면,
- container를 가져와(드래그할 수 있는 요소들이 모여있는 노드) dragging 클래스가 존재하지 않는 쿼리를 전부 가져옵니다. y는 드래그하는 노드의 y 좌표를 의미합니다.
- 가져온 노드들을 비교해 가장 가까운 노드를 찾습니다.
- 순서대로 getBoundingClientRect를 통해 엘리먼트의 크기와 뷰포트에 상대적인 위치 정보를 가져옵니다.
- 해당 정보로 offset을 계산하는데 offset은 각 요소의 중간 위치와 마우스 위치를 비교해 얼마나 떨어져 있는지, 위에 있는지 아래에 있는지를 나타냅니다.
- offset이 음수일 때 가장 가까운 요소를 찾고 먼 경우 다음 노드를 비교합니다.
- { offset: Number.NEGATIVE_INFINITY }의 경우 음의 무한대 값으로 처음 만나는 노드가 반드시 가장 가까운 노드가 될 수 있도록 합니다.
- 비교 후 가장 가까운 노드를 반환합니다.
해당 코드로 다음과 같은 결과를 만들 수 있었습니다.
문제 발생
여기서 문제가 발생했는데, 최상위 요소 말고도 자기 자신의 하위 요소로도 이동할 수 있다는 사이드 이펙트가 발생했습니다. 또, 부모 노드가 자식 노드를 포함해야 하는데 반대가 되는 경우에 발생하는 에러 메시지도 볼 수 있었습니다.

이를 해결하기 위해 다음과 같이 dragover 이벤트를 변경했습니다.
this.addEvent("dragover", ".editor__content--container", (e) => {
  e.preventDefault();
  e.stopPropagation();
  let parentNode = e.target.parentNode;
  const afterElement = getDragAfterElement(parentNode, e.clientY);
  const dragging = document.querySelector(".dragging");

  if (!dragging) return;

  if (afterElement) {
    parentNode.insertBefore(dragging, afterElement);
  } else {
    const grandparentNode = parentNode.parentNode;
    if (parentNode.classList.contains("editor__content--container")) {
      const parentIndex = [...grandparentNode.childNodes].indexOf(
        parentNode
      );
      const draggingIndex = [...grandparentNode.childNodes].indexOf(
        dragging
      );
      if (parentIndex >= grandparentNode.children.length - 1) {
        grandparentNode.appendChild(
          grandparentNode.children[draggingIndex]
        );
      }
      grandparentNode.insertBefore(
        grandparentNode.children[draggingIndex],
        grandparentNode.children[parentIndex]
      );
    }
  }
});
먼저, 드래그를 했을 때 노드들이 원했던 div에 위치하는 것이 아닌 child에 위치하고 있다는 규칙을 발견했고
- afterElement가 유효할 때
- afterElement가 undefined 일 때
두 경우로 나뉘었습니다.
1번의 경우 일반적인 방식으로 진행하였고,
2번의 경우 parent와 dragging의 Index를 직접 구해 노드의 위치가 적절하게 변경되도록 했습니다.

'프로젝트 > Vanilla JS 문서편집기' 카테고리의 다른 글
| [Vanilla JS 문서편집기 설명 및 개선] 9. Jest를 이용해 테스트 코드 적용하기 (2) | 2024.09.15 |
|---|---|
| [Vanilla JS 문서편집기 설명 및 개선] 8. Rich한 에디터 만들기(2) (1) | 2024.09.08 |
| [Vanilla JS 문서편집기 설명 및 개선] 6. 중앙 집중식 상태 관리 적용하기 (1) | 2024.09.04 |
| [Vanilla JS 문서편집기 설명 및 개선] 5. VirtualDOM처럼 렌더링하기 (1) | 2024.08.29 |
| [Vanilla JS 문서편집기 설명 및 개선] 4. 컴포넌트 템플릿 만들기 (0) | 2024.08.29 |